When one needs to develop his drawing skills, it is important to train in three different layers:
a) Developing the motor pattern b) Enhancing resistance against uncontrolled variables c) Application
File this information for a later post. Today, we are going to cover nine steps or nine tips that will help you achieve better overall performance while drawing from a concealed holster. Check it out.
- Identify the threat(s) and focus your eyes on it. Your gaze shouldn’t change until after the shots.

2. Clear your clothing vigorously, touching it by the sternum area. Don’t grab your shirt by its border or by the abdominal area.
3. Maintain a firm and high grip on the pistol. Do not neglect this step.
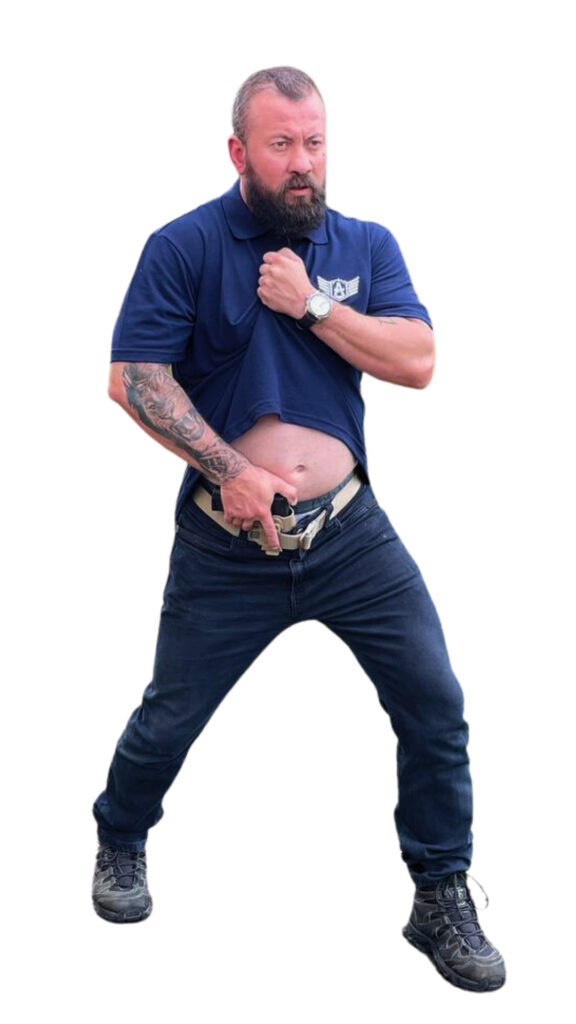
4. Use your thumb over the slide or over the red dot. Never let your thumb stay stiff or point upwards.
5. Draw your pistol by moving ONLY your arm. Do not move your torso, shoulders, or anything else.
6. Bring your pistol to the level of your armpit (not to the hips) where its barrel is supposed to be parallel to the ground.
7. Gather your hands to make a two-handed grip. Do not lower the hand that was holding the fabric to do so.
8. Present your firearm in front of your dominant eye. Your head isn’t supposed to move, as your gaze is still fixed on the enemy.
9. Shoot as many times as needed.
Mastering the art of drawing from a concealed holster is a skill that demands careful attention to detail and diligent practice. These nine steps provide a comprehensive guide to achieving a better overall performance in this crucial aspect of self-defense. By focusing on factors like threat identification, clothing clearance, grip, and posture, individuals can enhance their readiness and effectiveness in high-pressure situations. Stay safe, stay vigilant, and continue refining your skills to ensure your personal security and the well-being of those around you.
